The topic I ditched Windows Snap Layouts for a tiling window manager and finally got the Linux… is currently the subject of lively discussion — readers and analysts are keeping a close eye on developments.
This is taking place in a dynamic environment: companies’ decisions and competitors’ reactions can quickly change the picture.
I’ve been using Linux more lately, and I’m missing something when I hop back into Windows: a tiling window manager. Mostly, I miss opening an app and having its initial window just slot into the right place. No mousing it into the spot I want, no playing with snap layouts that just do not work well on my widescreen monitor.
Windows 11’s Snap Layouts aren’t horrible (they’re vastly better than what macOS offers), but they’re not great. So I spent an afternoon testing three tiling window managers on my Windows gaming PC to find out if I could get the Linux-style experience I wanted, and I found it. Eventually. After the worst install process of all three. Ugh.
Transform Windows multitasking with GlazeWM’s fast, keyboard-driven tiling workflow.
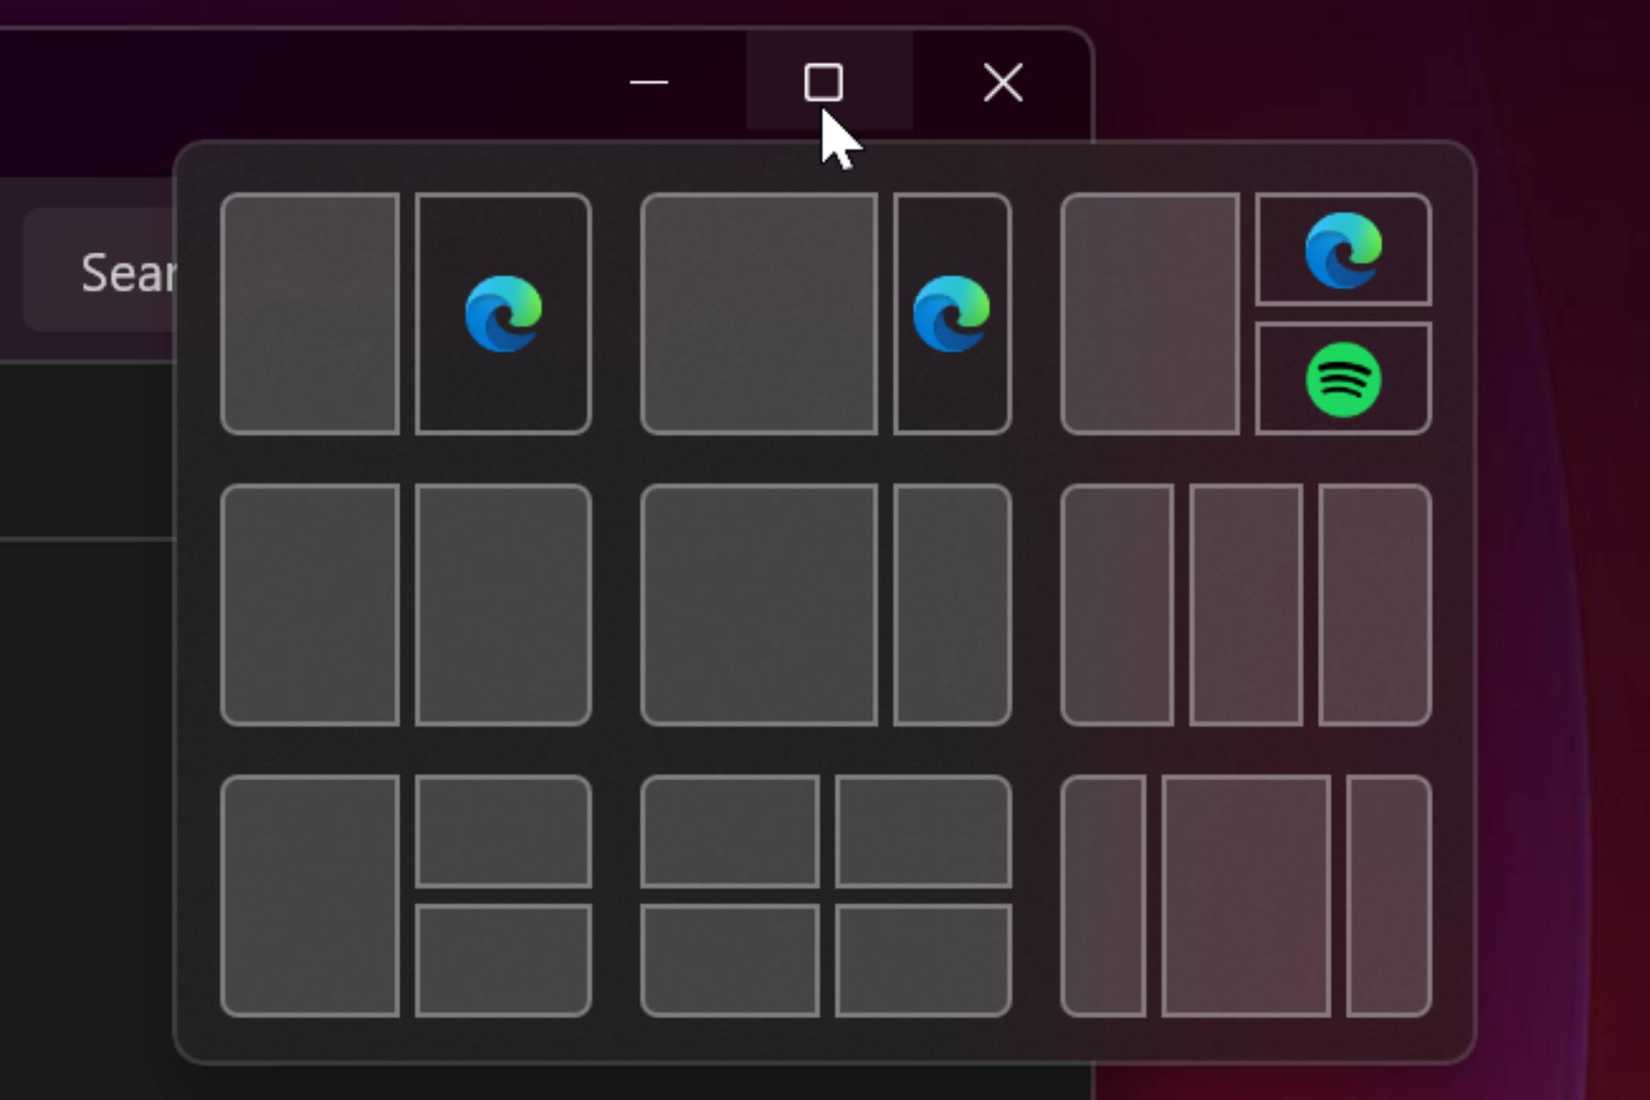
Snap Layouts look like tiled windows, but they’re not. Windows gives you two ways to access them: hover over the maximize button to get a layout picker, or drag a window to the top center of the screen to trigger the Snap Bar. Either way, Windows will arrange your current window into the zone you choose, and prompts you to fill in the rest.
But then when you open a second (and a third, and a fourth, and so on), and you end up having to manually snap each window into the quadrant that Snap Layouts provides. There’s also no persistence and no automation. Every new window has to go through this process.
Even Microsoft’s developer documentation notes that some desktop apps won’t work in Snap Layouts if their minimum window size exceeds the zone dimensions, so you can’t even guarantee the feature works for every app you use.
Multi-monitor users get it even worse. Dragging a window between displays often triggers the snap UI on accident, causing unwanted resizes mid-move.
You could try PowerToys’ FancyZones for more custom zones and persistent layouts, but it still makes you drag windows around to place them in zones. It’s a good step up from Snap Layouts, but I really want my windows to just manage themselves.
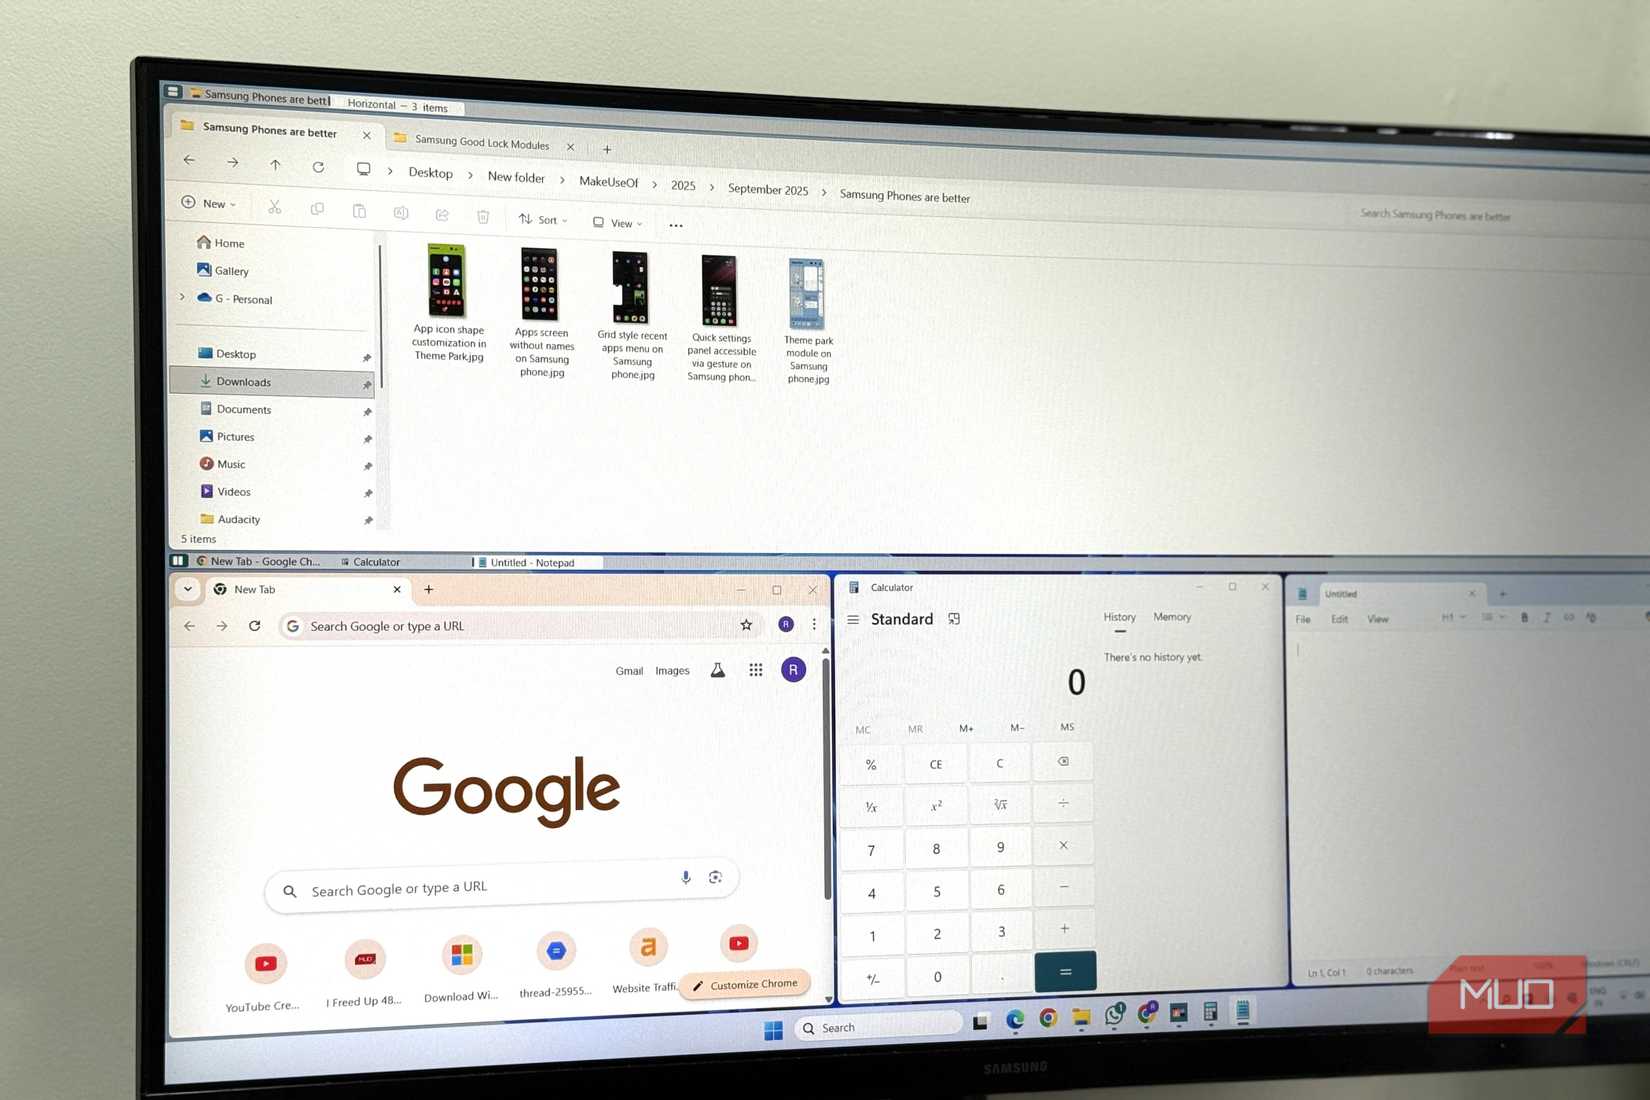
A true tiling window manager, like the ones I now use on Linux, takes care of where windows show up on your screen at the OS level. Every time you open a new app, the manager positions each window in a new slot onscreen. When you open the first app of the day, it takes up the whole screen. Open a couple more apps, they tile across the monitor without any effort needed on your part. The layout is always current, visible, and nothing overlaps. You never have to even think about where to move a new window.
Moving from window to window, and even opening windows in different virtual desktop spaces, is all done via the keyboard. Alt+H and Alt+L move the focus window left and right, while Alt+Shift+2 will send the active window to Workspace 2. Workspaces become the way you organize your work instead of just minimizing apps and alt-tabbing your way around.
Yes, there’s a bit of a learning curve, but it’s worth the effort. Once you spend that first awkward week, maybe with a printed out key command sheet on your desk, you’ll start using the system like a pro.
GlazeWM is inspired by i3wm and configured with a single YAML file, which made some tweaking pretty easy.
Launch it from PowerShell with glazewm, and it will (in theory) generate a default config file and launch Zebar, a minimal status bar that sits at the top of the screen to show your workspaces and system stats. In an instant, I was able to open a bunch of apps and every window that appeared dropped into a tiled layout automatically. No setup needed.
The keyboard shortcuts worked well, with Alt+H/J/K/L for focus movement, Alt+1 through Alt+9 to move workspaces. Moving around is super easy and felt like I’d found the environment I needed.
The one thing that I wanted to fix is the active window focus border; it’s thin and gray by default. I searched around and found a way to change it in the config by opening
in PowerShell, finding the window_effects section, and changing the color, and adding a thicker width.
The active outline was much easier to see after that quick change.
The second thing I noticed was that, since GlazeWM tiles windows horizontally across the screen, my 15-inch laptop monitor got a little tight after 4 or 5 windows up at once. Workspaces solve this by letting you spread apps across them rather than cramming them all on one screen, but it’s a limit nonetheless.
GlazeWM is fast and useable, and a super easy install, but after trying all three, it wasn’t my favorite.
Komorebi, the second WM I tried, was truly painful to install, but worth every minute. I’m glad I didn’t give up. Install it with these two lines, hitting Enter after each one:
These both install just fine. The problem is that winget didn’t add Komorebi’s bin folder to my PATH, so running the start command komorebic start in a fresh PowerShell window just failed while it tries again and again to launch komorebi.exe. The fix turned out to be launching komorebi.exe from its install path in one PowerShell window, and then running komorebic start –whkd –bar in a separate, second window.
Once you get past the install, generate a starter config file with komorebic quickstart, which creates komorebi.json for layout settings and whkdrc for keybindings in the home directory. Then it starts managing windows.
When I launched it, Komorebi ignored the windows I already had up and running. Only apps opened after Komorebi launches will get tiled.
The status bar also failed to launch on my machine, likely due to the PATH issue.
So why do I prefer this tool? First, the layout algorithm is smarter than Glaze. Komorebi was able to fit four windows comfortably on my 15-inch screen because it not only tiles horizontally, but also vertically. That way, it could create a layout on the fly with one large pane and two smaller secondary panes, instead of the equal split GlazeWM defaults to. Secondly, the keyboard shortcuts worked cleanly and felt more responsive than Glaze’s did. I just enjoyed using Komorebi, even though I hated installing it.
This was the smoothest install, but Windows messed up the hotkeys. It’s available on the Microsoft Store, and installs super easily there or in PowerShell using its Microsoft Store ID:
FancyWM did pick up my existing open windows at launch, which was better than Komorebi, and tiled them in a similar way. There’s a mouse-friendly title bar menu above each managed window, too, letting you split, float, or rearrange with clicks instead of keyboard shortcuts.
The problem I ran into was that FancyWM’s default activation key combo is Win+Shift, which Windows 11 already uses for its own shortcuts. Win+ Shift+T triggers Windows’ text capture tool, and Win+Shift+S opens the Snipping tool, so FancyWM never sees those keyboard shortcuts, making it feel like it’s not working. You can remap the activation hotkey in Settings > Keybindings, but it’s definitely something I wasn’t willing to do, since Komorebi was already working for me.
Because of the mouse features, FancyWM feels like getting a Windows machine to manage your windows while still remaining a Windows machine. It’s the right tool if you want tiling without having to learn keyboard shortcuts.
Still, if you want the more Linux experience with the keyboard as your main navigational tool, Komorebi (or GlazeWM, to be honest) is the way to go.
It really depends on your workflow whether you’ll get much out of a tiling WM on Windows. If you mainly work in full-screen apps or use the mouse for most navigation, then Snap Layouts will be just fine. The setup cost and learning curve for a true tiling window manager is real.
That said, if you use a lot of windows and prefer to keep your hands on the keyboard most of the time, and don’t mind a little learning, then a tiling window manager may be exactly what you want. They’re all easy (ish) to try out, too, so don’t hesitate to give them a quick test. I settled on Komorebi for now, but I do like the speed of GlazeWM and the mouse features of FancyWM, so you can’t really lose.